assembly instructions coaster fine furniture

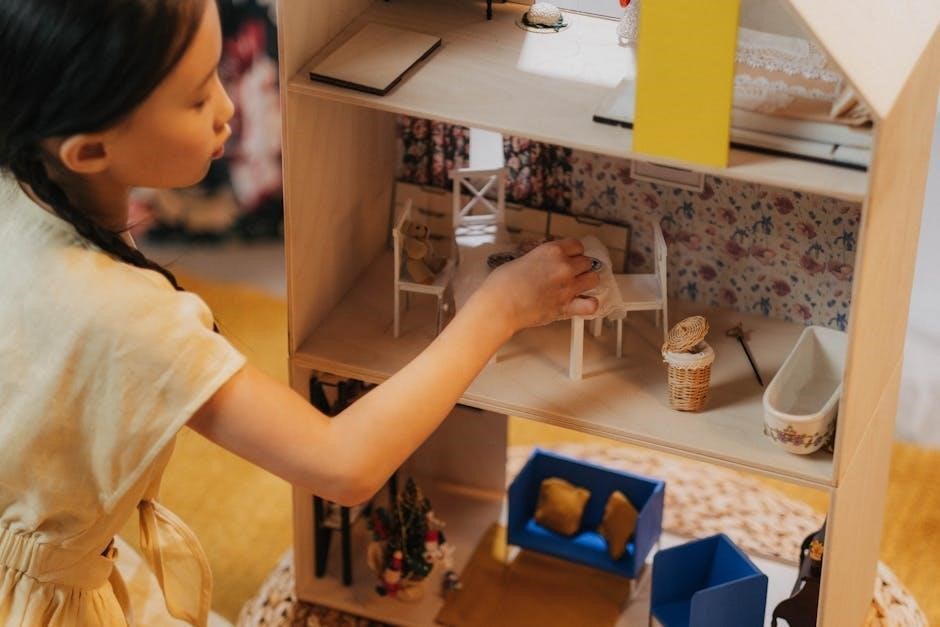
Coaster Fine Furniture assembly offers a seamless experience with detailed instructions, ensuring durability and style. Follow step-by-step guides for models like 200409Q, focusing on proper hardware organization and alignment for a sturdy, long-lasting setup.
1.1 Overview of Coaster Fine Furniture
Coaster Fine Furniture is renowned for its high-quality, stylish designs tailored for modern homes. Their products, like the 200409Q queen storage bed, combine functionality and elegance. With detailed assembly instructions, Coaster ensures seamless setup for durability and aesthetics. Each piece is crafted for home use, emphasizing comfort and longevity. The brand offers a range of furniture, from beds to TV stands, with clear guidelines for proper assembly. Coaster’s commitment to excellence makes their furniture a trusted choice for homeowners seeking both style and reliability.
1.2 Importance of Proper Assembly
Proper assembly of Coaster Fine Furniture ensures stability, durability, and safety. Incorrect assembly can lead to structural issues, potentially causing damage or instability. Following the provided instructions guarantees a secure and functional setup, preventing loose joints or misaligned parts. Proper assembly also enhances the furniture’s aesthetic appeal and longevity. Coaster’s assembly process is designed to be efficient, with estimated times like 20 minutes for certain models. By adhering to the guidelines, you ensure your furniture remains a reliable and stylish addition to your home for years to come.
1.3 Tools and Hardware Required
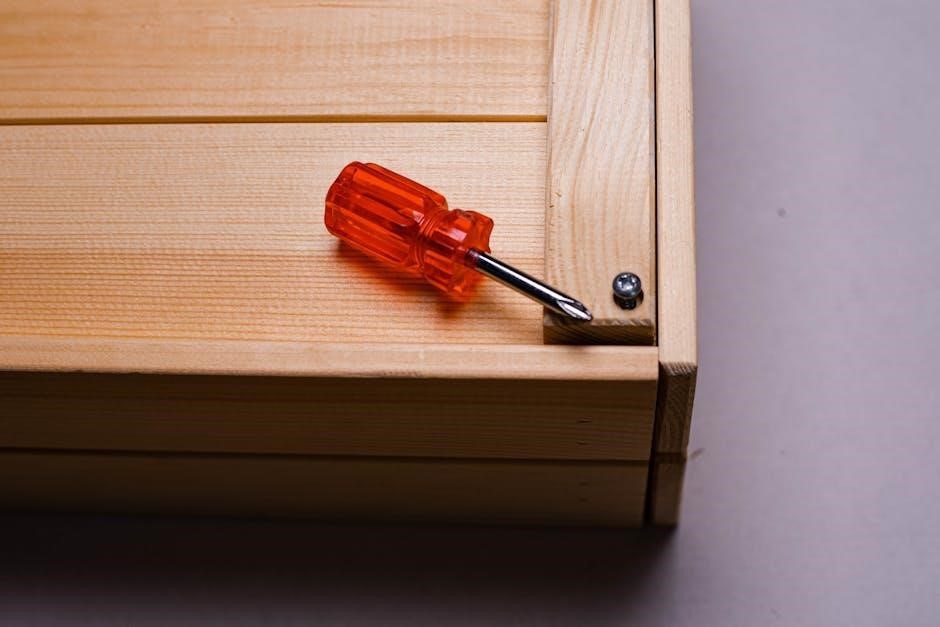
Assembling Coaster Fine Furniture requires specific tools and hardware to ensure a secure and proper setup. Essential tools include an Allen wrench (M6), bolts (3/16x16mm), and other fasteners provided in the kit. Begin by removing hardware from the box and sorting it by size to avoid confusion. Check that all parts and hardware are present before starting assembly. This organization ensures a smooth process and prevents delays. Additional tools, such as a screwdriver or wrench, may be needed for specific models. Properly identifying and preparing hardware is crucial for a successful assembly experience.
Pre-Assembly Preparation
Begin by unpacking and inventorying all components to ensure no parts are missing. Organize hardware by size and type for easy access during assembly. Read the manual thoroughly to understand the process and avoid mistakes.
2.1 Unpacking and Inventory
Begin by carefully unpacking all components from the boxes. Check for any visible damage and ensure all parts are accounted for using the provided inventory list. Separate hardware like screws, bolts, and Allen keys into labeled containers for easy access. Verify that all major pieces, such as frames, panels, and supports, are included. If any items are missing or damaged, contact customer support immediately. Organize the parts in a dedicated workspace to streamline the assembly process and avoid misplacement. This step ensures a smooth start and prevents delays during assembly. Double-check the inventory list to confirm everything is present before proceeding.
2.2 Organizing Parts and Components
After unpacking, organize all parts and components systematically. Separate hardware like screws, bolts, and Allen keys into labeled containers or ziplock bags. Group similar parts together, such as legs, panels, and frames, and place them near your workspace. Use trays or small bins to keep loose items visible and within reach. Lay out larger components like tabletops or shelves on a flat surface. Label each group to avoid confusion. A well-organized setup ensures efficiency and prevents misplacement of small parts. This step is crucial for maintaining clarity and reducing assembly time. Keep everything accessible to streamline the process.
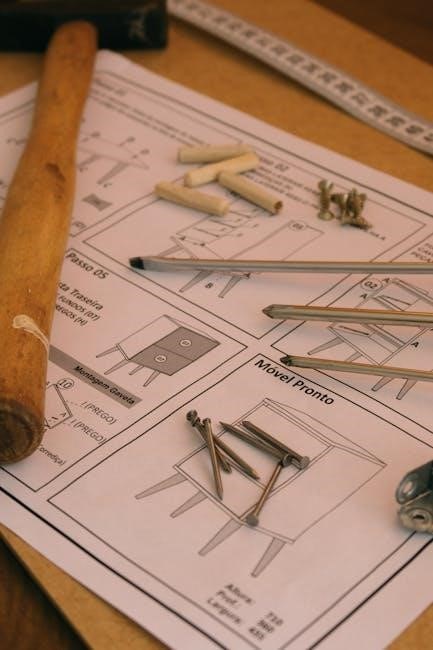
2.3 Reading the Instruction Manual
Before starting assembly, thoroughly read the instruction manual provided by Coaster Fine Furniture. Understand each step, and identify the parts and tools required. Familiarize yourself with diagrams and illustrations to visualize the process. Pay attention to specific instructions for handling fragile or complex components. Look for warnings or tips that may prevent mistakes. Reading ahead ensures you are prepared for each stage. Keep the manual nearby for quick reference during assembly. This step is essential for a smooth and accurate assembly process, helping you avoid errors and ensure all parts fit together correctly. Take your time to understand the instructions fully.
Basic Assembly Tools
- Screwdriver (Phillips and flathead)
- Allen wrench (commonly 3mm or 4mm)
- Socket wrench or ratchet
- Pliers or clamps
- Measuring tape
- Marker or pencil
3.1 Essential Tools for Assembly
The essential tools for assembling Coaster Fine Furniture include a screwdriver (both Phillips and flathead), an Allen wrench (typically 3mm or 4mm), and a socket wrench or ratchet. These tools are crucial for driving screws, tightening bolts, and securing joints. Additionally, pliers or clamps can help hold parts in place while assembling. A measuring tape and marker are useful for ensuring accurate alignment and marking drill holes if needed. These tools are fundamental for a smooth assembly process and should always be within reach to avoid delays.
3.2 Recommended Additional Tools
While essential tools are mandatory, additional tools can enhance efficiency and precision. A cordless drill or electric screwdriver is ideal for faster screw driving. An impact driver can handle stubborn bolts. A rubber mallet is useful for tapping parts into place without causing damage. Sandpaper may be needed to smooth rough edges, and a carpenter’s square ensures proper alignment. A worklight can provide better visibility, while clamps or a workbench help stabilize components. These tools are optional but can significantly improve the assembly experience, especially for complex or large furniture pieces.

Safety Precautions
Always wear safety gloves and eyewear. Ensure the workspace is clear and well-lit. Lift heavy parts carefully, and avoid overreaching. Keep tools sharp and undamaged.
4.1 General Safety Guidelines
When assembling Coaster Fine Furniture, prioritize safety to avoid injuries and damage. Always wear protective gloves and eyewear to prevent accidents. Ensure your workspace is clear, well-lit, and free from tripping hazards. Use a stable work surface and avoid overreaching. Lift heavy components carefully, bending at the knees to avoid straining your back. Never use dull or damaged tools, as they can slip and cause injury. Keep children and pets away from the assembly area. Follow all safety precautions outlined in the manual, and take regular breaks to stay alert and focused throughout the process.
4.2 Handling Heavy Components
When handling heavy components during assembly, prioritize safety to prevent injuries and damage. Always lift with a buddy, using proper lifting techniques to avoid straining your back. Bend at the knees, keep the load close to your body, and avoid twisting. Ensure the path is clear of obstacles before moving components. Use a dolly or slider for extra-heavy parts to minimize effort and risk. Never drag or drop components, as this can cause damage or personal harm. Take your time and plan each move carefully to ensure a smooth and incident-free assembly process.
4.3 Working in a Safe Environment
Creating a safe workspace is crucial for a successful assembly process. Clear the area of clutter, tripping hazards, and fragile items to minimize risks. Ensure the workspace is well-lit to avoid shadows that could obscure parts or tools. Use a non-slip floor mat to prevent tools from slipping or falling. Keep children and pets away from the assembly area to maintain focus and safety. Avoid working in a rushed or fatigued state, as this increases the likelihood of accidents. Always wear protective gear, such as gloves and safety glasses, to safeguard against potential hazards during assembly.

Step-by-Step Assembly Process
Follow the manual step-by-step, using provided tools and parts. Begin with the frame, then attach headboard, footboard, and slats. Ensure stability at each stage and complete with final checks.
5.1 Assembling the Frame
Start by assembling the frame, ensuring it is the foundation of your furniture. Use the provided hardware to secure the legs and sides together. Align the pieces carefully, following the instructions. Tighten bolts firmly but avoid over-tightening. Use a rubber mallet to tap parts into place gently. Double-check that all connections are secure and the frame is level. This step is crucial for stability, so take your time to ensure accuracy. Once the frame is stable, proceed to the next components, like attaching the headboard or footboard. A sturdy frame guarantees the rest of the assembly will go smoothly.
5.2 Attaching the Headboard
Position the headboard against the frame, aligning the pre-drilled holes. Use the bolts or screws provided to secure it tightly. Ensure the headboard is level and evenly spaced. Tighten the hardware gradually, checking the alignment as you go. If the headboard has adjustable brackets, set them to fit the frame snugly. Double-check the instructions for specific attachment points. Once secured, test the stability by gently rocking the headboard. Proper attachment ensures safety and prevents wobbling. Refer back to the frame assembly instructions if needed, as the attachment method may vary slightly depending on the design. A secure headboard ensures the bed’s structural integrity.
5.3 Securing the Footboard
Position the footboard against the bed frame, ensuring the pre-drilled holes align with the frame’s mounting points. Insert the bolts or screws provided through the footboard and into the frame. Tighten them firmly, but avoid over-tightening. Check that the footboard is level and evenly spaced for stability. If the footboard has adjustable brackets, ensure they fit snugly against the frame. Once secured, gently shake the footboard to confirm stability. Properly attaching the footboard is crucial for the bed’s structural integrity and safety. Refer to the instruction manual for specific bolt locations and torque recommendations to ensure a secure fit.
5.4 Installing Slats and Supports
Begin by placing the slats evenly across the bed frame, ensuring they align with the pre-marked positions. Secure each slat using the provided screws or bolts, tightening firmly but avoiding over-tightening. For added stability, install any center supports or brackets as indicated in the manual. Once all slats are in place, gently press down to ensure they are flush and evenly spaced. Check that the slats are tightly fastened to prevent shifting. If optional supports are included, attach them following the manufacturer’s instructions. Properly installed slats and supports ensure a sturdy base for the mattress and prevent sagging over time.
5.5 Adding Side Rails
Attach the side rails to the bed frame by aligning the pre-drilled holes with the corresponding bolts or screws. Use the Allen wrench or screwdriver to secure them tightly. Ensure the rails are evenly spaced and properly aligned with the frame. If brackets are provided, attach them first to the frame before mounting the rails. Double-check the alignment to ensure the rails are straight and level. Tighten all connections firmly but avoid over-tightening. Once the side rails are in place, verify stability by gently rocking the bed from side to side. Refer to the manual for specific bolt locations and torque specifications.
5.6 Mounting the Mattress Platform
Position the mattress platform onto the side rails, ensuring it is centered and evenly supported. Align the platform’s pre-drilled holes with the screws or bolts attached to the rails. Secure the platform using the provided screws or bolts, tightening them firmly with an Allen wrench or screwdriver. Check the platform’s alignment to ensure it is level and stable. Avoid over-tightening, as this may damage the material. Once mounted, gently press on the platform to confirm it is securely attached. Refer to the manual for specific screw locations and tightening sequences to ensure proper installation.
5.7 Final Alignment and Tightening
After completing the assembly, perform a final check to ensure all parts are properly aligned. Use an Allen wrench or screwdriver to tighten any loose screws or bolts. Check the mattress platform, side rails, and slats for stability. Ensure the headboard and footboard are securely attached and evenly aligned. Gently rock the furniture to test its sturdiness. Avoid over-tightening, as this may damage the material. Once satisfied with the alignment, tighten all connections one last time. Finally, inspect the entire piece to confirm everything is level, stable, and ready for use. This step ensures long-term durability and safety.
Additional Features and Components
This section covers optional features like drawers, storage, and decorative hardware to enhance functionality and aesthetics, ensuring a tailored fit for your space.
6;1 Adding Drawers or Storage
For models with drawers or storage compartments, begin by attaching the drawer glides to the frame using the provided screws. Ensure proper alignment for smooth operation. Next, assemble the drawer boxes by securing the sides and bottom panels together. Attach the drawer fronts, making sure they are flush and evenly spaced. Install the drawer handles or knobs, tightening them firmly. Finally, slide the drawers onto the glides and test their movement. If your furniture includes additional storage features, such as shelves or compartments, follow the manufacturer’s instructions for their installation. Always double-check alignment and functionality before finalizing.
6.2 Installing Hardware and Knobs
Begin by identifying the hardware and knobs designated for your furniture piece. Align each knob or handle with the pre-drilled holes on the drawers or cabinets. Use the provided screws to secure them tightly, ensuring they are evenly spaced and properly aligned. For handles, attach the mounting brackets first before screwing in the handle itself. Tighten all hardware firmly to avoid loose fittings. Double-check the alignment to ensure a professional finish. If your furniture includes additional decorative hardware, follow the same process, referring to the instruction manual for specific placement. Once installed, test the functionality of drawers or doors to ensure smooth operation.
6.3 Final Adjustments
Once all components are assembled, perform a thorough inspection to ensure everything is aligned and functioning properly. Check drawer glides for smooth operation and adjust them if necessary. Verify that all doors close evenly and make minor adjustments to hinges or handles as needed. Tighten any loose joints or screws to ensure stability. Use shims if the furniture is on an uneven surface to level it out. Finally, wipe down all surfaces to remove dust or fingerprints. Double-check the instruction manual to confirm all adjustments align with the manufacturer’s recommendations for optimal performance and longevity of your Coaster Fine Furniture piece.

Common Mistakes to Avoid
Forcing parts together can damage the furniture. Always follow the instruction sequence and ensure parts fit naturally. Double-check each step to avoid errors.
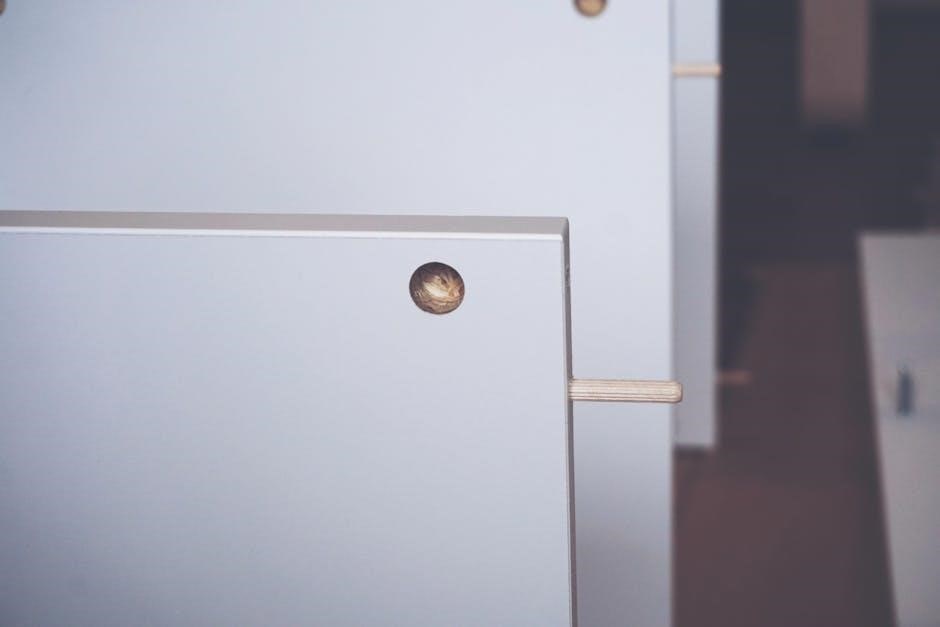
7.1 Misaligned Parts
Misaligned parts are a common issue during assembly, leading to uneven surfaces or structural instability. Always ensure holes, bolts, and connectors align perfectly before securing. Ignoring alignment can result in wobbly frames or difficulty attaching subsequent components. Take your time to verify each part’s position and orientation. Use clamps or extra hands to hold pieces steady while aligning. Refer to the instruction diagrams to confirm proper placement. Rushing this step can lead to disassembly and rework, wasting time and potentially damaging the furniture. Patience and precision are key to achieving a sturdy and professional finish.
7.2 Over-Tightening
Over-tightening is a common mistake during furniture assembly that can damage parts or strip screws. It stresses joints and may lead to warping or cracking of materials. Always follow the torque specifications in the manual. Use a torque wrench or screwdriver to avoid excessive force. If unsure, tighten just until parts feel secure, then check alignment. Over-tightening can make adjustments difficult and may void the warranty. Loose joints are easier to fix than damaged components, so err on the side of caution. This ensures longevity and stability of your Coaster Fine Furniture piece.
7.3 Skipping Steps
Skipping steps in the assembly process can lead to misalignment, instability, or even damage to the furniture. Each instruction is designed to ensure the structure is secure and balanced. Overlooking crucial steps, such as securing braces or aligning hinges, can result in a wobbly or unsafe finish. While it may save time initially, skipped steps often require time-consuming fixes later. Always follow the manual sequentially and double-check each component before moving on. This ensures a sturdy and long-lasting piece of Coaster Fine Furniture that meets its design standards.

Troubleshooting Tips
Troubleshooting Tips address common assembly issues such as missing parts, uneven surfaces, and loose joints; Early identification prevents disassembly and saves time, ensuring stability and safety.
8.1 Identifying Missing Parts
Begin by cross-referencing the inventory list with the parts received. Carefully check all boxes and packaging to ensure no items were overlooked. If parts are missing, contact Coaster’s customer support immediately for assistance. Double-check the instruction manual to confirm part numbers and descriptions. Avoid proceeding with assembly without all components, as this could lead to instability or damage. Coaster Fine Furniture typically provides clear part labeling, so verifying each item ensures a smooth assembly process. Addressing missing parts early prevents delays and ensures the furniture is assembled correctly and safely.
8.2 Fixing Uneven Surfaces
If your Coaster Fine Furniture appears uneven, inspect the legs or base for levelness. Use a spirit level to identify uneven areas. For minor adjustments, place shims or rubber pads under the legs to stabilize the surface. Ensure the floor is level, as uneven flooring can cause the furniture to wobble. If the issue persists, check for loose joints or misaligned parts. Tighten any loose connections and re-align components as needed. For severe unevenness, consult the instruction manual or contact Coaster’s customer support for guidance. Addressing this ensures stability and prevents potential damage to the furniture.
8.3 Addressing Loose Joints
Loose joints can compromise the stability of your furniture. Inspect the joint to ensure all bolts and screws are properly aligned. Tighten any loose hardware using the correct tools, such as an Allen wrench or screwdriver. Apply even pressure to avoid stripping screws. If joints remain loose, check for missing or damaged washers or inserts. Consider adding wood glue or tightening brackets for added stability. Avoid over-tightening, as this may damage the material. Once secure, test the joint by gently applying pressure to ensure it holds firm. Refer to the manual for specific torque recommendations to prevent over-tightening. Properly secured joints ensure long-lasting durability.
Manufacturer’s Warranty and Support
Coaster Fine Furniture offers a comprehensive warranty covering defects in materials and workmanship. The warranty typically lasts for one year from the date of purchase. Register your product to activate coverage. For assistance, contact customer support via phone or email. They provide repair or replacement options for eligible issues. Keep your proof of purchase for warranty claims. Coaster’s support team is dedicated to resolving assembly or product-related concerns promptly.
9.1 Understanding the Warranty
Coaster Fine Furniture provides a limited warranty ensuring products are free from defects in materials and workmanship. The warranty period varies by product but typically covers one year from purchase. Coverage includes repair or replacement of defective parts at no cost to the consumer. To file a claim, contact customer support with proof of purchase and a detailed description of the issue. Damage caused by misuse or improper assembly may void the warranty. Always review the warranty terms to understand exclusions and conditions before initiating a claim.
9.2 Contacting Customer Support
For assistance with assembly or product-related inquiries, contact Coaster Fine Furniture’s customer support team. Phone support is available Monday-Friday, 8 AM-5 PM PST, at 1-800-777-7575. You can also submit inquiries via email at support@coasterfurniture.com or through the contact form on their official website. Be prepared to provide your order number, product details, and a clear description of your issue for faster resolution. Responses are typically within 24-48 hours. For urgent matters, calling is recommended. Visit their website for additional contact options and support resources to ensure a smooth experience with your furniture assembly and ownership.
Completing your Coaster Fine Furniture assembly is a rewarding experience. Take pride in your handiwork and enjoy the comfort and style of your new piece.
10.1 Final Check and Inspection
Once assembly is complete, perform a thorough inspection to ensure all parts are securely attached and properly aligned. Double-check that all hardware is tightened evenly and no components are missing. Verify that the furniture is stable and even, with no wobbling or uneven surfaces. Inspect all joints and connections for tightness and durability. Ensure all safety precautions, like securing heavy parts, have been followed; Finally, review the instruction manual to confirm every step has been completed correctly. This final check ensures your Coaster Fine Furniture piece is safe, sturdy, and ready for use.
10.2 Enjoying Your Newly Assembled Furniture
With the assembly complete, it’s time to enjoy the fruits of your labor. Place your Coaster Fine Furniture in its designated area and admire the seamless integration into your space. Add your personal touches, such as bedding, decor, or accessories, to enhance its aesthetic appeal. Ensure all surfaces are clean and free from dust or debris. Finally, take a moment to appreciate the durability and craftsmanship of your new furniture. Proper assembly guarantees years of comfort and functionality, making your effort truly worthwhile. Relax, unwind, and enjoy the convenience and style your newly assembled furniture brings to your home.