brother ls2125i instruction manual

Brother LS2125i Instruction Manual: A Comprehensive Guide
This guide provides detailed instructions for the Brother LS2125i sewing machine, sourced from Brother’s official support website for manuals and assistance.
The Brother LS2125i is a popular, computerized sewing machine designed for both beginners and experienced sewists. It offers a blend of user-friendly features and reliable performance, making it ideal for a wide range of sewing projects. This machine boasts 25 built-in stitches, providing versatility for various fabrics and techniques.
As a computerized model, the LS2125i simplifies the sewing process with automatic features like needle threading and a one-step buttonholer. Brother provides comprehensive support, including downloadable manuals directly from their website (support.brother.com), ensuring users have access to detailed guidance. Its lightweight design and compact size also contribute to its appeal, making it easy to store and transport.
Understanding the Machine’s Features
The Brother LS2125i is packed with features enhancing the sewing experience. It includes 25 built-in stitches – essential, decorative, and stretch stitches – catering to diverse project needs. An automatic needle threader significantly speeds up setup, while the one-step buttonhole function delivers consistent results. The machine’s free arm is beneficial for sewing cuffs, sleeves, and other cylindrical shapes.
Adjustable sewing speed and stitch length/width controls offer customization. Brother’s support website (support.brother.com) details each feature’s functionality. The drop-in bobbin system is user-friendly, and the machine is compatible with a range of optional presser feet, expanding its capabilities. Its lightweight build adds to its portability and ease of use.
Safety Precautions
Prioritize safety when operating the Brother LS2125i. Always disconnect the power supply before cleaning, changing the needle, or threading. Never operate the machine with a damaged cord or plug. Keep fingers away from moving parts, particularly the needle and foot. Use only genuine Brother accessories to prevent malfunctions and potential hazards.
Avoid sewing over pins, as this can damage the needle and machine. Do not attempt to repair the machine yourself; contact authorized Brother service personnel for assistance. Supervise children when the machine is in use. Refer to the full instruction manual (available on support.brother.com) for comprehensive safety guidelines and warnings to ensure safe operation.

Getting Started: Initial Setup
Begin by carefully unpacking your Brother LS2125i and verifying all components are present, referencing the included parts list for a smooth start.
Unboxing and Component Checklist
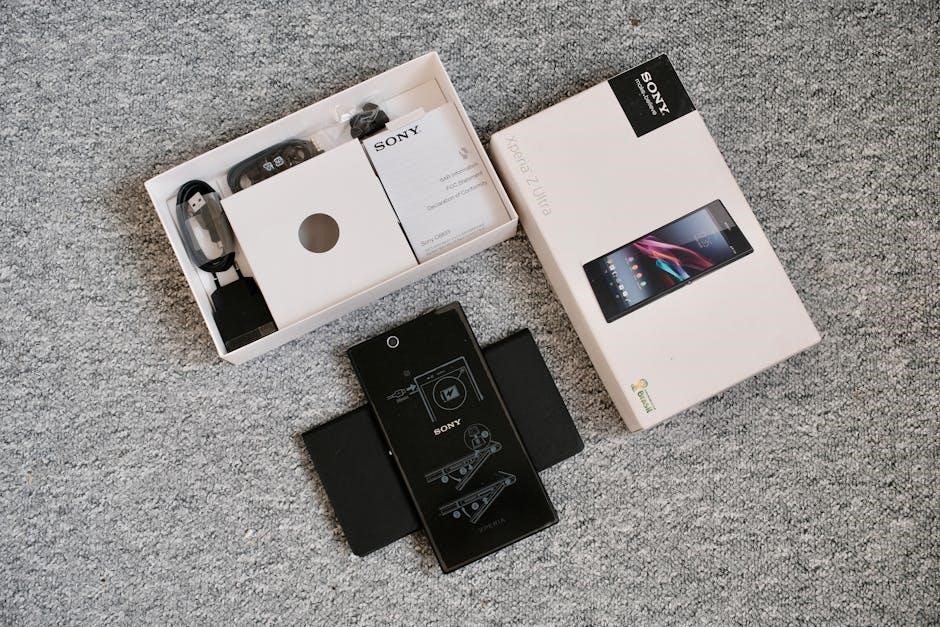
Upon receiving your Brother LS2125i sewing machine, carefully open the box and remove all packaging materials. A thorough check against the component list is crucial to ensure everything is included. You should find the sewing machine itself, a power cord, a foot controller, and various presser feet – likely including a zigzag foot and a buttonhole foot.
Also, locate the bobbin winder, several bobbins, a needle set (assorted sizes), a screwdriver, a seam ripper, and the operation manual. Don’t discard the packaging until you’ve confirmed all parts are present. Refer to the manual’s diagram for visual confirmation of each component. If anything is missing, immediately contact Brother support or the retailer where you purchased the machine. Proper setup begins with a complete inventory!
Powering On and Basic Operation
To power on your Brother LS2125i, connect the power cord securely to the machine and a functioning electrical outlet. Ensure the power switch, typically located on the side of the machine, is in the “Off” position before plugging it in. Once connected, switch it to “On.” The machine should illuminate, indicating it’s ready for operation.
The foot controller regulates sewing speed; gentle pressure results in slower stitching, while increased pressure increases speed. Begin with scrap fabric to practice. Select a stitch using the stitch selection dial and adjust the stitch length and width as desired. Always test your settings before working on your final project. Familiarize yourself with the basic controls for a smooth sewing experience.
Winding the Bobbin
Begin by placing the spool of thread onto the spool pin, securing it with the spool cap. Guide the thread through the thread guide, then wrap it several times around the bobbin, ensuring a secure start. Next, position the bobbin onto the bobbin winder spindle. Engage the bobbin winder by sliding the bobbin winder lever to the right.
Press the foot pedal gently to start the winding process. The machine will automatically stop when the bobbin is full. Disengage the bobbin winder lever and remove the fully wound bobbin. Properly wound bobbins are crucial for consistent stitch quality. Always use the correct type of bobbin for your LS2125i model.
Threading the Machine
Correct threading is vital for proper operation. Follow the numbered diagram in your manual to guide both upper and lower threads accurately.
Upper Threading Guide
Successfully threading the upper portion of your Brother LS2125i is crucial for consistent stitch formation. Begin by raising the presser foot; this opens the tension discs. Place the spool of thread onto the spool pin, securing it with the cap. Guide the thread through the first thread guide, then down and around the tension disc assembly, ensuring it seats firmly between the discs.
Next, continue threading upwards, following the numbered diagram in your manual. Pass the thread through the take-up lever – confirm it’s in the highest position – and then down through the needle clamp. Finally, thread the needle from front to back. Incorrect threading can cause skipped stitches or tension problems, so double-check each step against the illustrated guide.
Lower Threading (Bobbin) Guide
Proper bobbin threading is essential for a balanced stitch on your Brother LS2125i. First, ensure the machine is turned off. Locate the bobbin case and remove it by gently pulling it forward. Insert the pre-wound bobbin into the bobbin case, ensuring the thread unwinds in the correct direction – typically counter-clockwise.
Guide the thread through the tension spring on the bobbin case, then draw it out through the slot. Reinsert the bobbin case back into the machine, aligning it correctly. A slight click confirms proper placement. Incorrect bobbin threading leads to uneven stitches or thread bunching, so refer to the machine’s diagram for visual guidance and ensure a smooth thread path.
Thread Tension Adjustment
Achieving optimal thread tension is crucial for quality stitching with the Brother LS2125i. Begin with the tension dial set to its default position, usually marked ‘4’. Test stitch on a scrap fabric, observing the stitch formation. If the upper thread pulls the bobbin thread to the underside, increase the upper tension (higher number).
Conversely, if the bobbin thread appears on top, decrease the upper tension (lower number); Small adjustments are key; a slight turn of the dial can make a significant difference. Consistent tension ensures balanced stitches and prevents puckering or looping. Always re-test after each adjustment until a perfectly balanced stitch is achieved.
Basic Sewing Techniques
Mastering fundamental stitches is essential with the LS2125i. This section details how to perform straight, zigzag, and reverse stitches for various sewing projects.
Straight Stitching
The straight stitch is the most commonly used stitch for constructing garments and various sewing projects with your Brother LS2125i. Begin by selecting the straight stitch option on the stitch selection dial, typically indicated by a straight line symbol. Adjust the stitch length according to your fabric type; shorter lengths are ideal for delicate fabrics, while longer lengths suit heavier materials.
Ensure your fabric is placed correctly under the presser foot, aligning the desired sewing line with the needle. Gently depress the foot pedal to begin sewing at a consistent speed. Guide the fabric smoothly, avoiding pulling or pushing, allowing the machine to feed the material. For precise seams, use the seam guide markings on the needle plate. Practice maintaining a consistent seam allowance for professional-looking results. Remember to backstitch at the beginning and end of each seam to secure the stitches.
Zigzag Stitching
The zigzag stitch on your Brother LS2125i offers versatility for finishing raw edges, creating decorative effects, and sewing stretch fabrics. Select the zigzag stitch on the stitch selection dial – it’s usually represented by a zigzag pattern. Adjust both the stitch length and width using the corresponding controls. A narrower width is suitable for reinforcing edges, while a wider width creates bolder decorative patterns.
For stretch fabrics, a slightly wider zigzag allows the seam to stretch with the material, preventing breakage. When finishing edges, position the fabric edge so the zigzag stitch catches both layers, preventing fraying. Practice on scrap fabric to determine the optimal settings for your desired effect. Maintain a consistent sewing speed for uniform stitches and a professional finish.
Reverse Stitching
Reverse stitching, crucial for securing seams, is easily achieved on the Brother LS2125i. Locate the reverse lever or button – typically positioned near the handwheel or foot pedal. Engaging this lever directs the machine to sew backward. Begin and end each seam with a few reverse stitches to prevent unraveling. This creates a secure anchor for the thread.
Avoid excessively long reverse stitching sections, as they can create bulky seams. A short burst of 3-5 reverse stitches is generally sufficient. Release the reverse lever to return to forward stitching. Practice coordinating the lever with the foot pedal for smooth transitions. Consistent reverse stitching ensures durable and professionally finished projects, enhancing the longevity of your creations.

Advanced Stitching Options
Explore buttonhole, zipper, and overlock capabilities with your LS2125i, expanding project possibilities beyond basic stitches for creative sewing endeavors.
Buttonhole Stitching
The Brother LS2125i features a convenient one-step buttonhole function, simplifying the creation of professional-looking buttonholes. Begin by selecting the buttonhole stitch on the stitch selection dial. Next, position your button at the back of the buttonhole foot, ensuring it’s centered. Lower the presser foot and gently begin sewing; the machine automatically creates the buttonhole’s width.
The LS2125i will stop automatically at each corner, prompting you to rotate the fabric. Continue this process until the buttonhole is complete. For best results, use a stabilizer behind the fabric to prevent puckering. Practice on scrap fabric first to familiarize yourself with the process and achieve consistent buttonhole sizes. Remember to adjust the buttonhole size according to your button dimensions for a perfect fit every time.
Zipper Insertion
Inserting a zipper with the Brother LS2125i is achievable with the dedicated zipper foot. Attach the zipper foot to your machine. Position the zipper face down, aligning the zipper teeth evenly under the presser foot. Begin stitching close to the zipper teeth, using a straight stitch. Maintain a consistent seam allowance throughout the process.
Slowly guide the fabric and zipper under the foot, ensuring the teeth remain aligned. Once you reach the end, backstitch to secure the seam. Repeat this process on the opposite side of the zipper. For invisible zippers, utilize the invisible zipper foot and follow the specific instructions for this technique. Practice on scrap fabric to refine your technique and achieve professional results.
Overlock Stitching (if applicable)
The Brother LS2125i, while a versatile machine, does not feature a built-in overlock stitch function. This means it cannot directly replicate the professional finish of a dedicated serger. However, a zigzag stitch can simulate an overlock effect for finishing raw edges. Select a narrow, dense zigzag stitch setting.
Adjust the stitch width and length to achieve a secure and neat edge. Guide the fabric edge under the zigzag stitch, ensuring it fully encases the raw edge. This prevents fraying and provides a cleaner appearance. For heavier fabrics, a wider zigzag may be necessary. Remember this is a simulation, and won’t offer the same stretch or durability as a true overlock stitch.
Machine Maintenance
Regular cleaning and lubrication, as outlined in the Brother LS2125i manual, are crucial for optimal performance and longevity of your sewing machine.
Cleaning the Machine
Maintaining a clean sewing machine is paramount for smooth operation and preventing malfunctions. Always disconnect the power cord before commencing any cleaning procedures. Begin by removing the needle and presser foot. Use a soft brush, often included with the Brother LS2125i, to gently remove lint and dust from the bobbin area, feed dogs, and surrounding components.
For more stubborn lint, a vacuum cleaner with a brush attachment can be utilized, exercising caution not to damage delicate parts. Wipe down the exterior surfaces with a slightly damp cloth. Avoid using harsh chemicals or abrasive cleaners, as these can harm the machine’s finish. Regularly cleaning the bobbin case and race is essential for consistent stitch quality; Refer to the official Brother LS2125i instruction manual for detailed diagrams and specific cleaning recommendations.
Oil Points and Lubrication
Proper lubrication ensures the longevity and smooth functioning of your Brother LS2125i sewing machine. It’s crucial to use sewing machine oil specifically designed for this purpose; avoid household oils. Consult your LS2125i instruction manual for precise oil point locations, as improper lubrication can cause damage.
Typically, key oil points include the bobbin race, hook assembly, and any areas where metal parts move against each other. Apply a small drop of oil to each point, and then operate the machine briefly to distribute the lubricant. Wipe away any excess oil to prevent staining fabric. Over-oiling is as detrimental as under-oiling, so moderation is key. Regular, light lubrication, as outlined in the manual, will keep your machine running optimally for years.
Troubleshooting Common Issues
The Brother LS2125i, while reliable, can occasionally present issues. Common problems include thread breakage, skipped stitches, and machine jamming. Always consult the official instruction manual first for specific solutions. For thread breakage, re-thread the machine carefully, ensuring proper tension. Skipped stitches often indicate a dull or incorrect needle – replace it with the correct type and size.
If the machine jams, stop immediately and gently remove any tangled thread or fabric. Never force anything. Regularly cleaning lint buildup, as detailed in the manual, prevents many issues. If problems persist, refer to Brother’s support website for FAQs and further assistance. Remember to unplug the machine before any internal inspection or maintenance.
Understanding the Control Panel
The LS2125i’s control panel features a stitch selection dial, stitch length and width adjustments, and facilitates intuitive operation of the sewing machine.
Stitch Selection Dial
The stitch selection dial on your Brother LS2125i is the primary control for choosing the desired stitch pattern. Rotating the dial allows you to cycle through a variety of built-in stitches, including straight stitch, zigzag stitch, and various decorative options.
Each stitch is clearly marked with a corresponding number or symbol on the dial, making selection straightforward. Refer to the stitch chart included in your manual to understand the purpose and application of each stitch. The dial’s positioning is crucial; ensure it clicks firmly into place to guarantee the selected stitch is engaged correctly before beginning to sew.
Experimenting with different stitch settings will unlock the full creative potential of your machine, allowing for diverse sewing projects and personalized designs. Proper stitch selection is fundamental to achieving professional-looking results.
Stitch Length and Width Controls
The Brother LS2125i features dedicated controls for adjusting both stitch length and stitch width, offering precise customization for various fabrics and sewing techniques. Stitch length determines the distance between individual stitches, impacting the strength and appearance of the seam. Shorter lengths are ideal for delicate fabrics, while longer lengths suit heavier materials.
Stitch width controls the breadth of zigzag or decorative stitches, influencing the coverage and aesthetic effect. These controls are typically slider or dial mechanisms, allowing for incremental adjustments. Always test stitch settings on a scrap fabric before starting your project to ensure optimal results.
Understanding these controls is key to achieving professional-quality seams and decorative embellishments.
Foot Pedal Operation
The foot pedal controls the sewing speed of the Brother LS2125i, providing variable control over the stitching process. Gentle pressure results in slower sewing, ideal for intricate maneuvers or delicate fabrics. Increasing pressure on the pedal proportionally increases the sewing speed, suitable for faster, straight-line stitching on durable materials.
The pedal isn’t simply on/off; it’s a speed regulator. Consistent pressure maintains a steady pace, while releasing pressure immediately stops the needle. Mastering foot pedal control is crucial for accurate sewing and achieving desired stitch quality.
Practice coordinating foot pedal pressure with guiding the fabric for smooth, even seams.
Accessories and Their Uses
The Brother LS2125i comes with various presser feet and needles, enhancing its versatility for diverse sewing projects and fabric types, as detailed in the manual.
Presser Feet Guide
The Brother LS2125i sewing machine benefits greatly from its selection of presser feet, each designed for specific tasks. The standard zig-zag foot is ideal for everyday sewing and decorative stitches. A buttonhole foot simplifies creating consistent buttonholes, a frequently used feature.
For zipper insertion, a dedicated zipper foot allows precise stitching close to the zipper teeth. A blind hem foot creates nearly invisible hems, perfect for professional-looking finishes. Furthermore, a satin stitch foot is excellent for dense satin stitches and appliqué work. Understanding each foot’s purpose, as outlined in the instruction manual, unlocks the machine’s full potential. Proper foot selection ensures optimal stitch quality and fabric handling, leading to successful sewing outcomes.
Needle Selection Chart
Choosing the correct needle for your fabric is crucial with the Brother LS2125i. Universal needles (size 80/12, 90/14, 100/16) work well for woven fabrics. Ballpoint needles (sizes 75/11, 90/14) are essential for knits, preventing skipped stitches and fabric runs. Denim needles (sizes 90/14, 100/16) are designed to penetrate heavy fabrics like denim and canvas.
Leather needles (size 90/14) have a wedge-shaped point for leather projects. Stretch needles (size 75/11, 90/14) are ideal for highly elastic fabrics like spandex. The manual details a comprehensive chart, matching fabric weight and type to the appropriate needle size and type. Using the wrong needle can cause damage to both fabric and machine, so careful selection is paramount for optimal sewing results.
Optional Accessories
Enhance your Brother LS2125i’s capabilities with a range of optional accessories. A quilting foot facilitates precise quilting, while a blind hem foot creates professional-looking hems. Various presser feet, like the rolled hem foot, expand stitching options. Buttonhole foot variations offer different buttonhole styles. An embroidery hoop allows for basic freehand embroidery.
Additional spool pins accommodate more thread colors, and a needle threader simplifies threading. Extension tables provide a larger work surface for quilting or larger projects. Brother offers accessory kits containing several useful attachments. Refer to the official Brother website or authorized dealers for a complete list and compatibility information, ensuring optimal performance with your LS2125i.
Troubleshooting Guide
This section addresses common issues with the Brother LS2125i, offering solutions for thread problems, skipped stitches, and machine jams for smooth operation.
Thread Breakage Issues
Frequent thread breakage on your Brother LS2125i can stem from several causes. First, ensure you’re using the correct needle type and size for your fabric weight; a mismatched needle can cause excessive friction.
Secondly, re-thread the machine completely, both the upper and lower threads, verifying proper threading path adherence. Incorrect threading is a primary culprit. Check the bobbin winding – an unevenly wound bobbin can lead to tension issues and breaks.
Adjust the thread tension dial; too tight or too loose tension weakens the thread. Finally, inspect the needle for any damage, like burrs or bends, and replace it if necessary. Using quality thread also minimizes breakage occurrences.
Skipped Stitch Problems
If your Brother LS2125i is skipping stitches, begin by ensuring the needle is correctly inserted – it should be pushed fully into the needle clamp. Verify you’re using the appropriate needle type for your fabric; delicate fabrics require finer needles.
Check the needle’s condition; a bent or damaged needle will consistently cause skipped stitches. Re-thread the machine, paying close attention to the upper thread path and ensuring it’s properly seated in the tension discs.

Adjust the presser foot pressure; insufficient pressure can cause the fabric to lift, resulting in skipped stitches. Finally, confirm the bobbin is correctly inserted and the bobbin case is clean and free of lint.
Machine Jamming Solutions
When your Brother LS2125i jams, immediately stop and disconnect the power. Never force the handwheel! Gently remove the fabric and inspect the bobbin area for tangled threads or fabric pieces. Carefully clean out any lint buildup using a small brush – avoid using liquids.
Check the needle for bending or damage, replacing it if necessary. Ensure the upper thread is correctly threaded through all guides and the tension is appropriately adjusted. A poorly threaded machine is a common cause of jams.
Re-thread both the upper and lower threads, and test with a scrap fabric before resuming your project. Preventative maintenance, like regular cleaning, minimizes jamming.