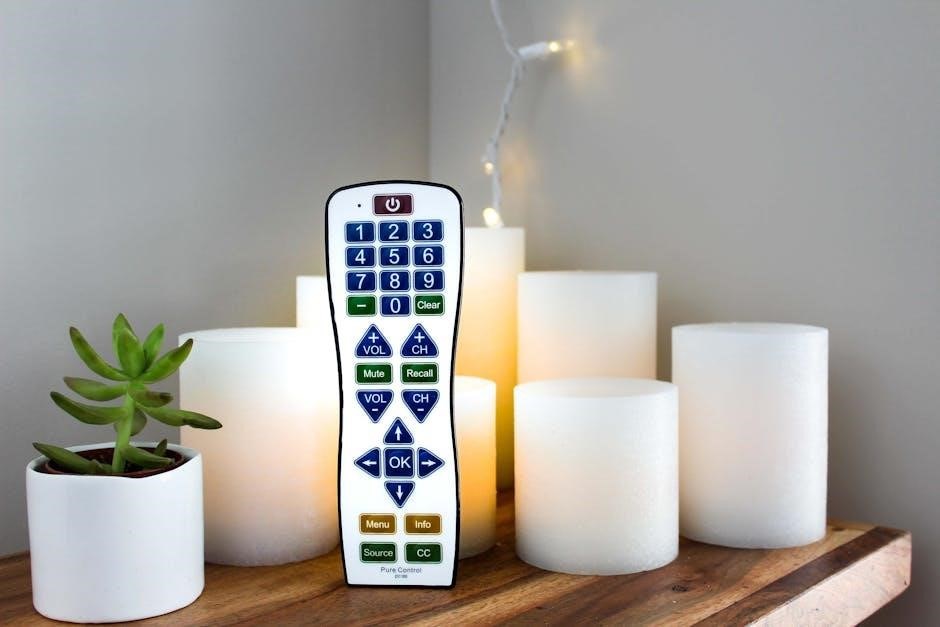
harbor breeze remote control instruction manual
Harbor Breeze Remote Control Instruction Manual: A Comprehensive Guide (Updated 03/30/2026)
Welcome! This comprehensive manual simplifies your Harbor Breeze remote experience, offering clear instructions for effortless control and maximizing your fan’s features today.
Harbor Breeze remotes are designed to provide convenient, wireless control of your ceiling fan and integrated lighting. These remotes offer a user-friendly interface, allowing you to adjust fan speeds, control light brightness, and utilize advanced features like timer settings and breeze modes – all from the comfort of your chair.
Understanding your remote is the first step to enjoying a more comfortable and controlled environment. This guide will walk you through everything from initial setup and pairing to troubleshooting common issues and exploring advanced functionalities. We aim to make the process as straightforward as possible, even for those unfamiliar with remote control technology.
This manual is specifically tailored to assist you in maximizing the benefits of your Harbor Breeze fan system. Learning the capabilities of your remote will enhance your overall experience and ensure optimal performance. Let’s begin unlocking the full potential of your Harbor Breeze remote!
Understanding Remote Control Models
Harbor Breeze offers several remote control models, each designed with varying features and compatibility levels. Basic models typically include on/off control, speed adjustment, and light operation. More advanced models incorporate features like timer functions, breeze modes, and reverse direction control. Identifying your specific model is crucial for accurate troubleshooting and utilizing all available functionalities.
Remote models are often distinguished by a model number, usually located on the back of the remote itself or within the battery compartment. This number is essential when seeking support or ordering replacement parts. Different generations of remotes may have slight variations in button layout or programming procedures.
This guide aims to cover the most common Harbor Breeze remote functionalities, but specific features may vary depending on your model. Refer to the diagrams and instructions provided to ensure compatibility and optimal performance. Knowing your remote’s capabilities unlocks a more personalized and convenient experience.
Remote Control Compatibility
Ensuring compatibility between your Harbor Breeze remote and ceiling fan is paramount for seamless operation. Not all remotes are universally compatible, even within the Harbor Breeze brand. Compatibility depends on the fan’s receiver unit and the remote’s frequency. Older fan models may require specific, older-generation remotes, while newer models often support updated versions.
Generally, remotes are designed to work with fans purchased around the same time. However, variations exist. Checking the fan’s model number and comparing it to the remote’s compatibility list (often found on the packaging or online) is highly recommended. If you’ve replaced your fan, the original remote might not function with the new unit.
Using an incompatible remote can result in no response, erratic behavior, or limited functionality. When in doubt, consulting the Harbor Breeze customer support team with both fan and remote model numbers is the best course of action for verification.
Initial Setup & Pairing
Get started easily! This section guides you through the essential steps of installing batteries and successfully pairing your new Harbor Breeze remote with your ceiling fan.
Battery Installation & Types
Powering Your Remote: Ensuring your Harbor Breeze remote has the correct battery power is crucial for reliable operation. This remote typically requires two AAA batteries, though some models may utilize AA batteries – always verify the specific type indicated inside the battery compartment.
Installation Process: Gently slide open the battery compartment cover, usually located on the back of the remote. Insert the batteries, paying close attention to the polarity markings (+ and -) inside the compartment. Incorrect battery insertion will prevent the remote from functioning. Once the batteries are securely in place, slide the compartment cover closed until it clicks into position.
Battery Recommendations: For optimal performance, we recommend using high-quality alkaline batteries. Avoid mixing old and new batteries, or different battery types. Regularly check the batteries and replace them when performance diminishes or the remote becomes unresponsive. Dispose of used batteries responsibly, following local regulations.
Pairing the Remote to the Fan
Establishing Connection: Before enjoying full control, your Harbor Breeze remote needs to be paired with your ceiling fan. Begin by ensuring the fan is powered off. Locate the ‘reset’ or ‘pair’ button on your fan’s motor housing – this is often a small, recessed button. Press and hold this button for approximately 3-5 seconds, until a light on the fan begins to flash, indicating pairing mode.
Remote Activation: Simultaneously, on your remote, press and hold the ‘power’ button for 3-5 seconds. The remote’s indicator light should also begin to flash, confirming it’s attempting to connect. If pairing is successful, the flashing lights on both the fan and remote will cease.
Troubleshooting Pairing: If pairing fails, repeat the process, ensuring you are within a reasonable distance (10 feet) of the fan. If issues persist, consult the ‘Troubleshooting Pairing Issues’ section for further assistance.
Troubleshooting Pairing Issues
Pairing Difficulties? If your Harbor Breeze remote refuses to pair, don’t worry! First, verify fresh batteries are installed in the remote – low battery power can hinder the pairing process. Ensure no other Harbor Breeze fans nearby are simultaneously in pairing mode, as this can cause interference.
Reset & Repeat: Try resetting both the fan and the remote. Power cycle the fan by switching it off at the breaker for 60 seconds, then back on. Repeat the pairing process precisely as described, holding the buttons for the correct duration.
Signal Interference: Keep the remote within 10 feet of the fan during pairing. If problems continue, check for potential sources of radio frequency interference, like other electronic devices. If all else fails, consult the ‘Replacing Your Harbor Breeze Remote’ section.
Basic Remote Functions
Essential Control: This section details the core functions – powering the fan on/off, adjusting speed settings, and managing the integrated light features easily.
Power On/Off Operation
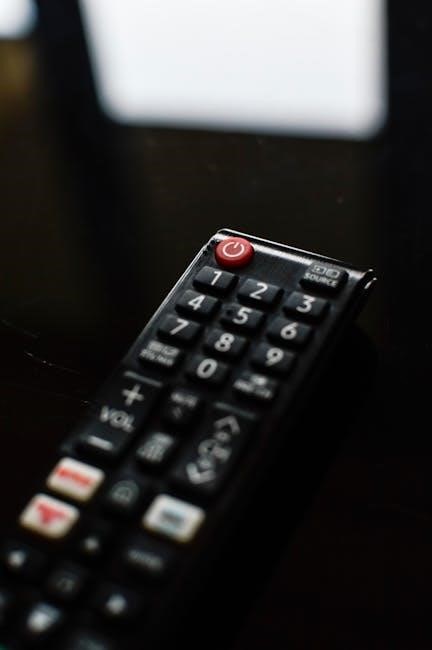
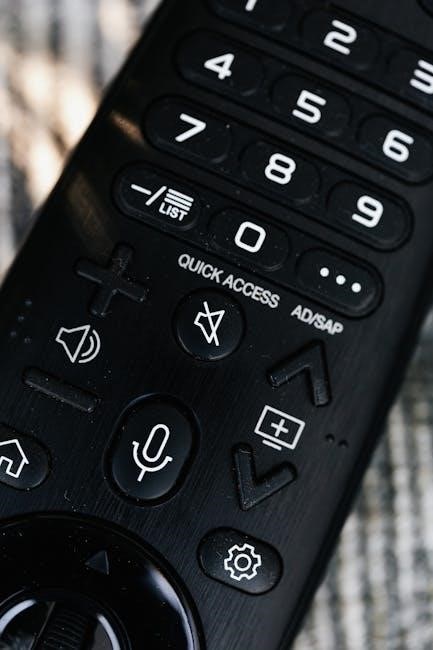
Simple Activation: Controlling your Harbor Breeze fan’s power is straightforward with your remote. Locate the dedicated “Power” button, typically marked with a universal power symbol – a circle with a vertical line. A single press of this button will toggle the fan’s power state.
Visual Confirmation: Upon pressing the Power button, observe the fan itself for confirmation. The fan blades should begin to rotate if powering on, or cease rotation if powering off. Additionally, some models feature an indicator light on the fan housing that illuminates when the fan is active.
Remote Feedback: The remote itself may also provide feedback. Some remotes illuminate the Power button briefly when pressed, confirming the signal transmission. Ensure a clear line of sight between the remote and the fan’s receiver for reliable operation. If the fan doesn’t respond, consult the troubleshooting section.
Speed Control Settings (Low, Medium, High)
Adjusting Airflow: Your Harbor Breeze remote provides precise control over the fan’s speed, allowing you to customize airflow to your comfort. Typically, three speed settings are available: Low, Medium, and High, each clearly labeled on the remote with corresponding icons or text.
Incremental Control: To increase or decrease the fan speed, repeatedly press the “Speed” button. Each press cycles through the available settings – Low, Medium, High, and then back to Low. Observe the fan blades to confirm the speed change; a noticeable increase or decrease in airflow indicates successful adjustment.
Optimal Settings: Low speed is ideal for gentle breezes, Medium provides a balanced airflow, and High delivers maximum cooling. Experiment with each setting to find the perfect level of comfort for your environment. Ensure the remote has a clear path to the fan receiver for responsive speed control.
Light Control – Dimming & Color Temperature
Illumination Options: Many Harbor Breeze remotes offer comprehensive control over the integrated light kit, including dimming capabilities and, on select models, adjustable color temperature. Dedicated buttons on the remote typically manage these functions, often indicated by a lightbulb icon.
Dimming Functionality: To dim the light, press the “Dim” or “Light Dim” button. Repeated presses will cycle through various brightness levels, from full brightness to off. Some remotes feature a smooth dimming function, offering gradual adjustments. Ensure the light bulb is compatible with dimming for optimal performance.
Color Temperature Adjustment: If your model supports it, a “Color Temp” or similar button allows you to switch between warm white, cool white, and daylight settings. This feature lets you customize the ambiance to suit your preference. Experiment to find the ideal lighting for any occasion.
Advanced Remote Features
Unlock Full Potential: Explore features like reverse direction control, programmable timers, and the innovative Breeze Mode for personalized comfort and enhanced fan operation;
Reverse Function (Direction Control)
Controlling Airflow: The reverse function, often symbolized by a rotating arrow on your Harbor Breeze remote, allows you to change the direction of the fan blades. This is a crucial feature for optimizing comfort throughout the year. In warmer months, a downward airflow creates a cooling breeze, directly felt below the fan.
Seasonal Adjustment: Conversely, during cooler seasons, switch to an upward airflow. This gently circulates warm air trapped near the ceiling, distributing it evenly throughout the room without creating a direct, chilling wind. This subtle adjustment can significantly reduce heating costs.
Operation: Simply press the ‘Reverse’ button on your remote. The fan blades will change direction. Ensure there are no obstructions near the fan before operating the reverse function. Experiment with both settings to determine which provides the most comfortable environment for your needs. Consistent use of this feature maximizes energy efficiency and year-round comfort.
Timer Settings & Programming
Automated Control: Your Harbor Breeze remote offers convenient timer settings, allowing you to automate fan operation for enhanced comfort and energy savings. These settings enable you to pre-program the fan to turn on or off after a specified duration, eliminating the need for manual adjustments.
Programming Options: Typically, you’ll find options for setting timers in increments of 30 minutes, 1 hour, 2 hours, up to a maximum of 8 or 12 hours, depending on the model. To program, press the ‘Timer’ button repeatedly until your desired time is displayed. The fan will then automatically operate according to your settings.
Cancellation: To cancel a programmed timer, simply press the ‘Timer’ button until the display shows ‘0.0H’. This will revert the fan to manual operation. Utilizing the timer function promotes energy conservation and provides a personalized comfort experience tailored to your schedule.
Breeze Mode Explained
Natural Comfort: Breeze Mode on your Harbor Breeze remote simulates a natural wind experience, offering a more comfortable and less static airflow than traditional fixed-speed settings. This mode intelligently varies the fan speed, mimicking gentle gusts of wind, preventing the chilling effect often associated with continuous high-speed operation.
Variable Speed: When activated, Breeze Mode cycles through a range of speeds – low, medium, and high – in an irregular pattern. This creates a dynamic airflow that feels more akin to a natural breeze, enhancing overall comfort, particularly during sleep. It’s ideal for bedrooms and living areas where a consistent airflow can feel overly intrusive.
Activation & Benefits: To engage Breeze Mode, simply press the designated ‘Breeze’ button on your remote. Enjoy a more natural and relaxing environment with this thoughtfully designed feature!
Troubleshooting Common Issues
Quick Solutions: Encountering problems? This section provides straightforward fixes for typical Harbor Breeze remote issues, ensuring your fan operates smoothly and efficiently again.
Remote Not Responding
Initial Checks: If your Harbor Breeze remote isn’t responding, begin with the simplest solutions. First, ensure the batteries are fresh and correctly installed, observing proper polarity (+ and -). Weak batteries are the most frequent cause of remote failure; Next, verify there are no obstructions between the remote and the fan’s receiver – direct line of sight is often crucial.
Resetting the Remote: Sometimes, a simple reset can resolve the issue. Remove the batteries from the remote for approximately 60 seconds, then reinsert them. This can clear any temporary glitches. If the problem persists, try cleaning the battery contacts with a dry cloth to remove any potential corrosion.
Receiver Issues: In rare cases, the issue might lie with the fan’s receiver. Ensure the fan itself is receiving power. If other functions (like wall control) work, the receiver is likely functioning, pointing back to the remote. Consider checking the fan’s manual for receiver-specific troubleshooting steps.
Fan Not Responding to Remote
Confirming Power & Pairing: If the fan isn’t responding to the remote, first confirm the fan is receiving power – check the wall switch and circuit breaker. Then, revisit the pairing process outlined earlier in this manual. A lost connection between the remote and fan is a common culprit. Ensure you’re within a reasonable range of the fan during pairing.
Signal Interference: Other electronic devices can sometimes interfere with the remote’s signal. Try temporarily turning off nearby devices like televisions, radios, or other remote-controlled appliances to see if this resolves the issue. Also, fluorescent lights can occasionally cause interference.
Receiver Reset: As a last resort, consult your fan’s main instruction manual for instructions on resetting the fan’s receiver. This often involves a specific sequence of power cycles and may require accessing the fan’s internal components – proceed with caution!
Light Not Working with Remote
Bulb Check & Compatibility: The most frequent cause is a burned-out bulb! Ensure the light bulb is securely screwed in and hasn’t reached the end of its lifespan. Verify the bulb type is compatible with your Harbor Breeze fan – using an incorrect wattage or bulb style can prevent operation. Refer to your fan’s specifications for approved bulb types.
Dimmer Functionality: If the light is dimming but not fully off, or vice versa, the dimmer function on the remote might be the issue. Try cycling through the dimmer settings several times to reset it. Some models have a minimum brightness level.
Receiver Issue: If the bulb is good and the dimmer isn’t the problem, the receiver controlling the light may be faulty. Consult the “Fan Not Responding to Remote” section, as the receiver often controls both fan and light functions.
Replacing Your Harbor Breeze Remote
Lost or broken remote? Discover options for finding a direct replacement or programming a universal remote for seamless control of your Harbor Breeze fan.
Finding Replacement Remotes
Locating a genuine Harbor Breeze remote is often the simplest solution. Start by checking the retailer where you originally purchased your fan – Lowe’s is a primary source for Harbor Breeze products and frequently stocks replacement remotes. Their website (lowes.com) allows you to search by model number, ensuring compatibility.
If your local store doesn’t have it in stock, online marketplaces like eBay and Amazon are excellent resources. Be sure to carefully verify the model number listed on the remote to guarantee it matches your fan’s receiver.
Important Note: Harbor Breeze remotes are often specific to certain fan models. Using an incorrect remote may result in limited functionality or no operation at all. When searching online, utilize precise keywords including “Harbor Breeze remote,” followed by your fan’s model number for best results. Consider contacting Harbor Breeze customer support directly for assistance in identifying the correct replacement remote for your specific fan.
Universal Remote Compatibility
Exploring universal remotes presents a cost-effective alternative to purchasing a genuine Harbor Breeze replacement. Many popular universal remote brands, such as Logitech Harmony, GE, and RCA, boast compatibility with a wide range of ceiling fans, including Harbor Breeze models. However, successful programming is crucial.
Before purchasing, verify the universal remote’s device code list includes Harbor Breeze or a compatible ceiling fan brand. Online databases maintained by the remote manufacturers often provide this information.
Programming typically involves entering a specific code corresponding to your fan’s brand. The remote’s instruction manual will guide you through this process. If the initial code doesn’t work, try alternative codes listed for Harbor Breeze or similar fan manufacturers. Be patient, as finding the correct code may require some trial and error. Ensure the remote is in programming mode and follows the steps precisely.
Programming a Universal Remote for Harbor Breeze
Successfully programming a universal remote requires careful adherence to the manufacturer’s instructions. Begin by ensuring your remote has fresh batteries and is in programming mode – usually activated by a dedicated “Setup” or “Learn” button. Consult your universal remote’s manual for specific steps.
Next, locate the Harbor Breeze device code. These codes are typically found in the remote’s manual or on the manufacturer’s website. Enter the code using the remote’s number pad, following the on-screen prompts. The remote may ask you to test functionality, such as power on/off or speed control.
If the initial code fails, systematically try alternative codes listed for Harbor Breeze or similar brands. Some remotes offer an “auto-search” function that cycles through codes until a compatible one is found. Patience is key; programming can sometimes be a lengthy process. Once programmed, test all functions to confirm full compatibility.
Remote Maintenance & Care
Protect your investment! Regular cleaning, proper storage, and cautious handling will significantly extend the life and optimal performance of your Harbor Breeze remote.
Cleaning the Remote Control
Maintaining a clean remote ensures reliable operation and prolongs its lifespan. Before cleaning, always remove the batteries to prevent accidental activation and potential damage. Use a soft, dry cloth to wipe down the exterior of the remote, removing dust and fingerprints. For stubborn grime, lightly dampen the cloth with water – never spray liquid directly onto the remote!
Avoid harsh chemicals, abrasive cleaners, or solvents, as these can damage the plastic casing and internal components. A mild soap solution can be used sparingly on the cloth for tougher stains, but ensure the remote is thoroughly dried afterward. Pay particular attention to cleaning around the buttons, as dirt and debris can accumulate and hinder their functionality. After cleaning, allow the remote to air dry completely before reinserting the batteries. Regular, gentle cleaning is key to keeping your Harbor Breeze remote in optimal condition.
Storing the Remote Properly
Proper storage safeguards your Harbor Breeze remote from damage and ensures its longevity. When not in use, store the remote in a dry, cool place, away from direct sunlight and extreme temperatures. Avoid locations with high humidity, as moisture can corrode the internal components. A drawer, shelf, or dedicated remote caddy are ideal storage solutions.
Protect the remote from potential impacts or crushing forces – do not place heavy objects on top of it. If you have young children or pets, consider storing the remote out of their reach to prevent accidental damage or ingestion of batteries. Regularly check the battery compartment for corrosion, even when the remote is stored. Removing the batteries for extended periods of non-use is also recommended. Thoughtful storage habits contribute significantly to the reliable performance of your Harbor Breeze remote.
Preventing Damage to the Remote
Protecting your Harbor Breeze remote from damage is crucial for consistent operation. Avoid dropping the remote, as internal components are sensitive to impact. Keep liquids away from the remote – spills can cause irreversible corrosion. Do not attempt to disassemble the remote; this will void any warranty and could lead to malfunction.
Clean the remote regularly with a soft, dry cloth; harsh chemicals or abrasive cleaners can damage the surface and buttons. Be mindful of battery leakage – if you suspect a leak, remove the batteries immediately and clean the compartment with a cotton swab dipped in rubbing alcohol. Avoid exposing the remote to extreme temperatures or direct sunlight for prolonged periods. Careful handling and preventative measures will significantly extend the life of your Harbor Breeze remote, ensuring years of reliable use.