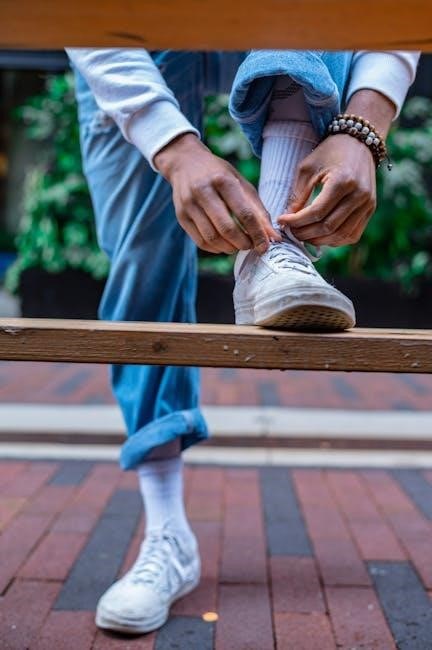
step by step paracord bracelet instructions pdf

Paracord bracelets are versatile, stylish, and functional accessories with origins in military survival tools. They offer a practical way to carry paracord, which can be unraveled for emergencies. Crafting these bracelets is a popular DIY project, perfect for outdoor enthusiasts and crafters alike. With step-by-step guides and PDF tutorials, anyone can create their own paracord bracelet, choosing from various weaves and styles to suit their preferences. This guide provides comprehensive instructions to help you get started on your paracord bracelet-making journey.
What is a Paracord Bracelet?
A paracord bracelet is a durable, wearable accessory crafted from high-strength parachute cord, originally designed for military use. Made from 550 paracord, it offers unmatched strength and versatility. These bracelets are not only stylish but also functional, serving as a survival tool. They can be unraveled to provide up to several meters of cord for emergencies, such as securing shelter or creating a makeshift rope. Popular among outdoor enthusiasts, paracord bracelets combine practicality with fashion, making them a favorite DIY project. They come in various weaves, from the classic Cobra pattern to intricate designs, offering endless customization options for crafters.
Why Make a Paracord Bracelet?
A paracord bracelet is more than just an accessory—it’s a practical survival tool and a creative project. By making one, you carry up to 3 meters of durable paracord, perfect for emergencies like securing shelter or repairing gear. It’s also a stylish way to express your personality with customizable colors and weaves. Crafting a paracord bracelet is a rewarding DIY activity that enhances your handiwork skills. Plus, it makes a thoughtful, functional gift for outdoor enthusiasts. Whether for fashion, survival, or fun, a paracord bracelet offers endless benefits, making it a worthwhile project for anyone interested in practical crafting.
Materials Needed
To craft a paracord bracelet, you’ll need 8-10 feet of 550 paracord, a plastic or metal buckle, scissors for trimming, and a lighter to melt ends and prevent fraying. A measuring tape is also essential for sizing. These simple tools ensure a sturdy and stylish accessory.
Paracord: Types and Length Requirements
The most common type of paracord used for bracelets is 550 paracord, known for its durability and strength. It is preferred for its 550-pound tensile strength, making it ideal for survival situations. For a standard bracelet, 8-10 feet of paracord is typically required, though this can vary depending on wrist size and the complexity of the weave. Other types, like 450 or 325 paracord, are lighter but less sturdy. The length ensures enough cord to create a functional and stylish accessory, with extra for emergencies. Always cut slightly more than needed to account for knotting and trimming.
Buckle: Plastic vs. Metal Options
Choosing the right buckle is essential for both functionality and style. Plastic buckles are lightweight, cost-effective, and ideal for casual wear. They come in various colors and are easy to install. Metal buckles, such as stainless steel or aluminum, offer greater durability and a sleek, rugged appearance. For most paracord bracelets, a 3/8-inch buckle is recommended. Metal buckles are preferred for survival-focused designs, while plastic is better for everyday use; Both options provide a secure closure, but metal buckles are more resistant to heavy use. Select based on your intended use and personal preference for the perfect balance of strength and style.
Scissors and Other Tools
Scissors are essential for cutting paracord cleanly and precisely. Sharp, dedicated scissors or a utility knife work best. A lighter or torch is needed to melt the ends of the paracord to prevent fraying. A ruler or measuring tape ensures accurate measurements for your project. Optional tools include a weaving needle for tighter knots and a bracelet jig for maintaining tension. These tools simplify the process and help achieve professional-looking results. Keep them organized and within reach to streamline your bracelet-making experience. Proper tools are key to a successful and frustration-free crafting session.
Melted Ends: Preventing Fraying
Melting the ends of paracord is crucial to prevent fraying, ensuring durability and a clean finish. Use a lighter or torch to carefully melt the cut ends until they form a small, rounded bead. This process seals the fibers, stopping them from unraveling. Avoid overheating, as it can weaken the cord. Properly melted ends not only enhance the bracelet’s appearance but also extend its lifespan. This simple step is vital for both functional and aesthetic reasons, making it a key part of the bracelet-making process. Always handle heat tools with caution to achieve the best results safely.
Measuring Your Wrist
Accurate wrist measurement ensures a comfortable fit. Wrap a flexible tape measure snugly around the narrowest part of your wrist, noting the circumference in inches; This step is essential for determining the correct cord length, ensuring your bracelet neither slips off nor feels too tight. Proper measurement is the foundation of a well-fitting paracord bracelet, making it both practical and stylish. Always measure carefully to achieve the perfect size for your accessory.
How to Measure Wrist Circumference
To measure your wrist circumference, wrap a flexible tape measure or a piece of string snugly around the narrowest part of your wrist. Ensure the tape is not too tight or too loose for an accurate fit. If using a string, mark the point where it overlaps, then measure the length with a ruler. This measurement is crucial for determining the correct length of paracord needed for your bracelet. Proper sizing ensures comfort and functionality, whether you’re crafting a survival bracelet or a stylish accessory. Always double-check your measurement for the best fit.
Calculating the Required Cord Length
To determine the correct length of paracord for your bracelet, start with your wrist circumference measurement. A general rule is to multiply this measurement by three for a standard bracelet length. For example, a 7-inch wrist requires about 21 inches of paracord. However, add 10-12 inches extra for knots and weaving. This ensures the bracelet is neither too tight nor too loose. Use a buckle or knot to secure the ends, allowing for easy size adjustments. Proper calculation ensures a comfortable, functional, and stylish paracord bracelet tailored to your needs. Always double-check your math for accuracy;

The Cobra Weave Paracord Bracelet Tutorial
The Cobra Weave is a classic and durable design, perfect for both beginners and experienced crafters. Originally created for military use, it serves as a stylish and functional survival tool. This tutorial guides you through step-by-step instructions to create a Cobra Weave paracord bracelet, ensuring a secure and visually appealing result. Follow along to master this timeless design and enjoy a practical accessory for everyday wear or emergency situations.
Step 1: Starting the Cobra Weave
Begin by cutting a length of paracord, typically 7-9 feet, depending on your wrist size. Fold the cord in half and attach one end to a stable object or your shoe. This setup allows you to work hands-free. Next, create a Larks Head knot by looping the folded end over the buckle or base cord, ensuring the ends align evenly. Secure the knot by pulling gently to tighten. This forms the foundation of the Cobra Weave, setting the stage for the subsequent weaving steps. Make sure the knot is snug but not overly tight to maintain even tension throughout the bracelet.
Step 2: Tightening the Knots
After forming the initial Larks Head knot, gently pull both ends of the paracord to tighten the knot. Ensure it’s snug but not overly tight, as this will affect the bracelet’s overall fit. Use scissors to trim excess cord close to the knot, and carefully melt the ends with a lighter to prevent fraying. This step is crucial for securing the weave and maintaining its integrity. Make sure the knots are evenly spaced and tightly woven to ensure durability. Properly tightened knots will ensure your bracelet is both functional and visually appealing, ready for everyday wear or survival situations.
Step 3: Completing the Weave
Once the knots are tightened, carefully tuck the excess paracord ends under the weave to secure them. Use a lighter to melt the ends, ensuring they don’t fray. This step finalizes the bracelet’s structure and prevents unraveling. Trim any excess cord neatly. To complete, pass the free ends through the buckle and tighten the final knot. Double-check the weave for consistency and adjust as needed. Your paracord bracelet is now ready to wear or use in emergencies. Properly completing the weave ensures durability and functionality, making it a reliable accessory for outdoor adventures or everyday style.

Other Popular Paracord Bracelet Weaves
Explore various styles like the Zig-Zag, Chain Sinnet, and King Cobra weaves. Each offers a unique aesthetic and functionality, catering to different preferences and uses.
Zig-Zag Weave Instructions
The Zig-Zag weave is a visually striking pattern that adds texture to your bracelet. Start by creating a base knot, then alternate crossing strands over and under to form the zig-zag design. Tighten each knot to secure the pattern. This weave is ideal for two-color designs, allowing for vibrant contrast. Follow a step-by-step PDF guide to master the technique, ensuring even spacing and consistent tension for a polished look. With practice, the Zig-Zag weave becomes a standout addition to any paracord bracelet collection;
Chain Sinnet Weave Tutorial
The Chain Sinnet Weave creates a sleek, braided appearance and is ideal for paracord bracelets. Start by securing one end of the cord to a buckle or anchor point. Loop the paracord around the base, crossing strands to form a chain-like pattern. Repeat this process, ensuring each loop is snug and evenly spaced. Tighten the knots as you go to maintain a consistent texture. This weave is versatile, works well with two colors, and can be finished with a loop or buckle. Follow a step-by-step PDF guide for clear visuals and instructions to master the Chain Sinnet Weave effortlessly.
King Cobra Weave Guide
The King Cobra Weave is an advanced version of the Cobra Weave, offering a more intricate and textured design. It involves looping the paracord in a specific pattern, creating a double-layered effect for added durability. To start, secure one end of the paracord to a buckle or anchor. Loop the cord around the base, crossing strands to form the King Cobra pattern. Ensure each loop is snug and evenly spaced. Tighten the knots as you progress for a consistent finish. This weave is ideal for experienced crafters and provides a robust, stylish accessory. Follow a detailed PDF guide for step-by-step visuals and instructions.
Two-Color Paracord Bracelet Instructions
Combine two colors for a vibrant look. Use four feet of one color and ten feet of another. Alternate colors using the Chain Sinnet method for a stylish, functional design.
Choosing Colors for Contrast
Selecting contrasting colors enhances the visual appeal of your two-color paracord bracelet. Opt for complementary hues like navy and neon green or black and red for bold statements. Neutral tones paired with vibrant shades create striking designs. Consider the purpose of the bracelet—outdoor use may benefit from high-visibility colors. Ensure the colors complement each other without clashing. A dominant color for the base and an accent color for highlights often works well. This approach ensures your bracelet stands out while maintaining aesthetic balance. Proper color selection elevates both functionality and style.
Integrating Multiple Colors
Integrating multiple colors into your paracord bracelet adds complexity and style. Start by selecting complementary colors, ensuring they blend seamlessly. Begin with a base color for the majority of the weave, then incorporate accent colors at specific intervals. Use a second color for highlights or patterns, weaving it into the design as desired. For a professional finish, ensure the ends are securely melted to prevent fraying. This technique allows for creativity while maintaining the bracelet’s functionality. By mastering this method, you can craft unique, multi-colored designs that stand out. Experiment with different combinations to achieve your desired aesthetic.

Paracord Bracelet Without a Buckle
For a buckle-free design, use a loop and knot method. Start by folding the paracord and securing it with a Lark’s Head knot. Weave the cord through the loop, ensuring tight knots for stability. Finish by tucking the ends under the weave and melting them to prevent fraying. This method creates a sleek, minimalist bracelet that remains functional and stylish. It’s perfect for those who prefer a simple, no-buckle look while maintaining the bracelet’s durability and utility.
Loop and Knot Method
The loop and knot method eliminates the need for a buckle, creating a sleek, minimalist bracelet. Start by folding the paracord in half and securing it with a Lark’s Head knot. This forms the foundation loop. Next, weave the cord through the loop, creating a series of tight knots to ensure stability. As you progress, gently pull the cord to tighten the knots evenly. Once the desired length is reached, tuck the ends under the weave and melt them with a lighter to prevent fraying. This technique results in a durable, buckle-free bracelet that remains functional and stylish, perfect for everyday wear.
Survival Features of Paracord Bracelets
Paracord bracelets are crafted with 550 paracord, offering durability and strength. They provide up to 3.5 meters of cord for emergency situations, making them a vital survival tool.
Integrated Survival Tools
Paracord bracelets are designed with integrated survival tools, making them essential for outdoor adventures. The 550 paracord used in these bracelets provides up to 3.5 meters of durable cord, which can be unraveled for emergencies like creating shelter, securing gear, or starting a fire. Some bracelets include additional features such as a built-in ferro rod for fire starting, a whistle for signaling, or a small knife. These tools are seamlessly integrated into the bracelet’s design, ensuring they remain compact and wearable while offering critical functionality in survival situations.
Emergency Deployment Techniques
Paracord bracelets are designed for quick deployment in emergencies, allowing users to access the cord rapidly. The bracelet’s structure enables easy unraveling, providing a reliable source of cordage for critical tasks. Techniques include sliding the buckle to release the weave or using a quick-release method to unwind the paracord swiftly. Integrated tools like ferro rods or whistles enhance functionality, ensuring readiness for survival situations. Proper deployment ensures the cord remains tangle-free and ready for use in emergencies, making paracord bracelets a practical addition to any outdoor or survival kit.

Troubleshooting Common Issues
Common issues include uneven knots, frayed ends, and loose weaves. Tightening knots, trimming excess, and re-weaving sections can resolve these problems effectively.
Fixing Uneven Knots
Uneven knots can ruin the appearance of your paracord bracelet. To fix this, gently loosen the knot and re-tighten it evenly. Ensure all knots align properly for a uniform look. If the issue persists, trim the excess cord near the knot and re-weave the section. Using a lighter to melt the ends prevents fraying. Regularly checking and adjusting knots during the weaving process can help avoid unevenness. This step ensures your bracelet remains both functional and visually appealing.
Adjusting Bracelet Length
To adjust the bracelet length, measure your wrist circumference and calculate the required cord length. Slip the cord through the buckle, ensuring even distribution. Pull both ends gently to tighten or loosen the weave. This ensures a comfortable fit without compromising the bracelet’s structural integrity. For buckles, slide the ends to achieve the desired size. If needed, trim excess cord and melt the ends to prevent fraying. Proper adjustment ensures the bracelet is neither too tight nor too loose, providing both functionality and style.

Downloadable PDF Resources
Find step-by-step paracord bracelet instructions in downloadable PDF guides. These printable tutorials offer easy-to-follow directions, making it simple to craft your own paracord accessories anytime, anywhere.
Where to Find Free PDF Guides
Free paracord bracelet PDF guides are widely available online; Popular platforms like Pinterest, Google, and YouTube offer tutorials and downloadable instructions. Websites specializing in DIY crafts often provide step-by-step guides. Search for “paracord bracelet instructions PDF” to find high-quality resources. Many crafting communities share printable tutorials for various bracelet styles. Additionally, forums and blogs dedicated to outdoor enthusiasts frequently offer free downloads. Look for sites with clear step-by-step instructions and photos to ensure a smooth crafting experience. These guides are perfect for beginners and experienced crafters alike, offering detailed tips for creating durable and stylish bracelets.
Benefits of Printable Tutorials
Printable paracord bracelet tutorials offer unmatched convenience and clarity. They provide step-by-step instructions with visuals, making the crafting process easy to follow. PDF guides are portable, allowing you to craft anywhere without internet access. High-quality images and detailed descriptions ensure accuracy, even for complex weaves. Printable tutorials also enable you to customize projects by marking pages or annotating steps. Sharing them with friends or group projects is simple, making them ideal for collaborative crafting. These guides are durable and reusable, providing long-term value for crafting enthusiasts. Whether you’re a beginner or an expert, printable tutorials enhance your paracord bracelet-making experience.
Styling Your Paracord Bracelet
Customize your bracelet with beads or multiple colors for a personalized look. Layering different weaves creates a fashionable statement, making each piece uniquely yours. Beads add texture and style.
Customizing with Beads
Add a personal touch to your paracord bracelet by incorporating beads. Beads can enhance the aesthetic appeal and create a unique design. Choose from various materials like metal, plastic, or decorative charm beads. They can be placed strategically along the weave to add texture and visual interest. For example, placing a bead at the center or alternating beads with knots can create a striking pattern. Ensure the beads are secure by tightening the surrounding knots. This customization allows you to express your style, making the bracelet a one-of-a-kind accessory. Experiment with different bead sizes and colors to match your preferences. Beads also make thoughtful additions for personalized gifts.
Layering for a Fashion Statement
Layering paracord bracelets is a great way to create a bold and stylish look. By stacking multiple bracelets of varying textures and colors, you can add depth to your outfit. Mix different weaves, such as the Cobra Weave and Zig-Zag, for a unique combination. Pairing bracelets of contrasting colors or patterns enhances visual appeal. For a more rugged style, layer a thick weave with a slimmer one. Experiment with metallic or beaded accents to add shine. Layering allows you to express your personality while keeping the practical benefits of paracord intact. It’s a simple yet effective way to elevate your accessory game.
Crafting paracord bracelets is a rewarding DIY project that combines creativity with practicality. With patience and practice, you can create stylish, functional accessories. Downloadable PDF guides make it easy to follow step-by-step instructions and master various designs. Whether for personal use or as a gift, paracord bracelets are a timeless and versatile choice. Happy crafting!
Begin by measuring your wrist to determine the required cord length. Cut the paracord accordingly and attach it to a buckle. Start the weave by crossing the cords, then loop them around each other to form knots. Tighten each knot securely as you progress. Continue the pattern until the bracelet reaches your desired length. Finish by tucking the ends under the weave and trimming excess cord. Use a lighter to melt the ends for a clean finish. Follow step-by-step PDF guides for clarity and ensure a professional-looking result. This method ensures a sturdy, stylish bracelet perfect for any occasion.
Final Tips for Crafting Success
For a polished paracord bracelet, patience and attention to detail are key. Always use high-quality materials, like 550 paracord, for durability. Keep your workspace clean and well-lit to avoid mistakes. Tighten knots gradually to maintain evenness and prevent loosening over time. Practice basic knots beforehand to ensure consistency. For a professional finish, melt ends neatly and trim excess cord. Refer to step-by-step PDF guides for visual clarity. Don’t hesitate to unravel and restart if errors occur. With practice, you’ll master the craft, creating stylish and functional paracord bracelets effortlessly. Happy crafting!